Replacing 3rd brake light on 2005 Ford F-150

Don’t be selfish . . .

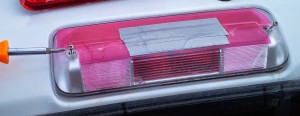
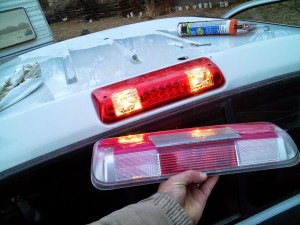
Our 3rd brake light was damaged in hailstorms. There were lots of cracks on the plastic and I know, eventually, moisture would burn out the bulbs or water might get into the cab.

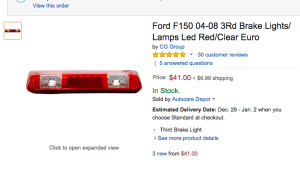
This will work for Ford F-150s 2004, 2005, 2006, 2007, and 2008.

Steps:

  1. Buy part on Amazon for $40ish – http://www.amazon.com/gp/product/B0052UIKL4/ref=cm_cr_ryp_prd_ttl_sol_11
    Replacing 3rd brake light on 2005 Ford F-150
  2. Get your tools ready:
    1. Phillips head screwdriver.
    2. Rag.
    3. Truck keys.
    4. Stick or 2×4 about 2 feet long, or happy assistant to push on brake pedal (children old enough to complain about chores are a great option).
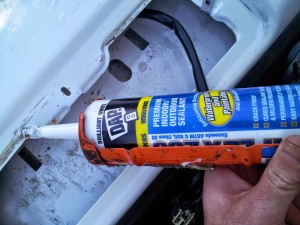
    5. Caulk – I used DAP from Home Depot.
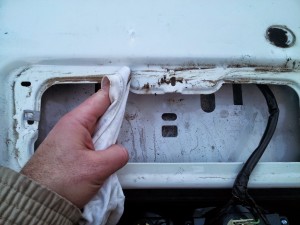
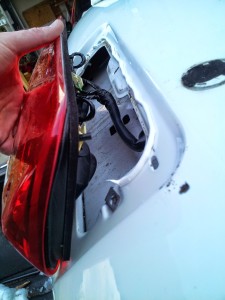
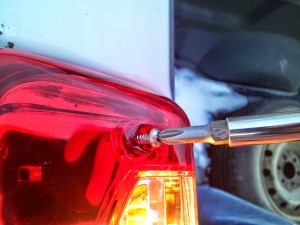
  3. Unscrew old light. Set screws aside in a place where they won’t roll off.
    Replacing 3rd brake light on 2005 Ford F-150
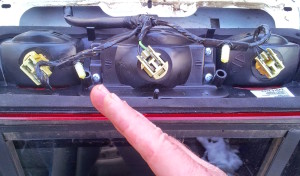
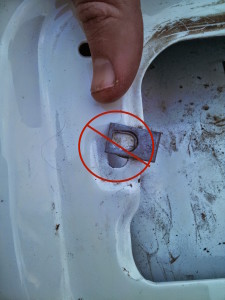
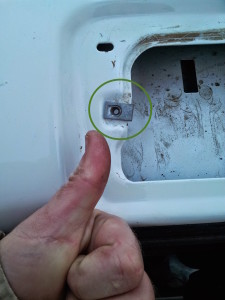
  4. Twist light bulb connectors from horizontal to 10 o’clock – 4 o’clock orientation (see picture).
    Replacing 3rd brake light on 2005 Ford F-150Replacing 3rd brake light on 2005 Ford F-150
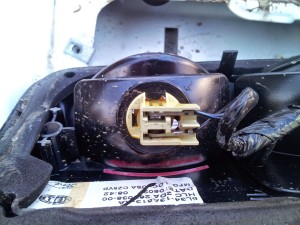
  5. Gently remove bulbs.
    Replacing 3rd brake light on 2005 Ford F-150
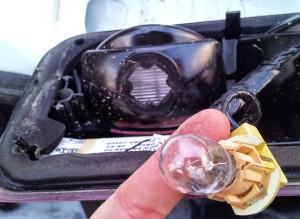
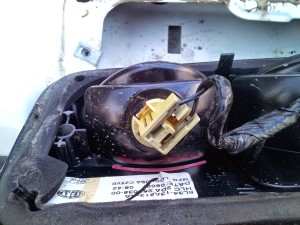
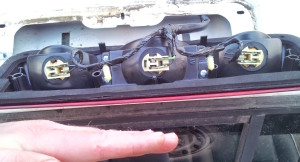
  6. Remove center bulb and discard.
    1. At first, I was worried that I had purchased the wrong part but removing the center bulb to expose the connector showed the new light was a plug-and-play match.
      Replacing 3rd brake light on 2005 Ford F-150
      Replacing 3rd brake light on 2005 Ford F-150
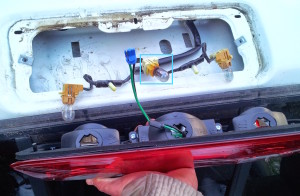
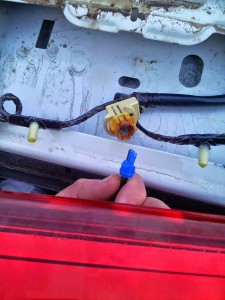
  7. Plug in electrical connector into new light.
    Replacing 3rd brake light on 2005 Ford F-150
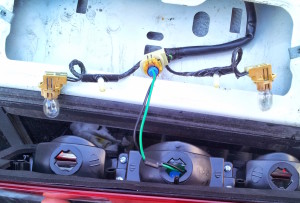
  8. Place bulbs in new light in a 10 o’clock – 4 o’clock orientation (see picture).
    Replacing 3rd brake light on 2005 Ford F-150
  9. Push and twist bulbs to be in a horizontal position.
    Replacing 3rd brake light on 2005 Ford F-150
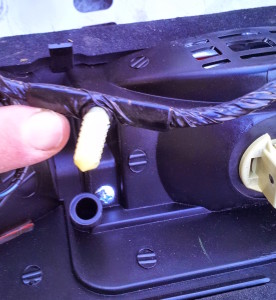
  10. Push 2 white plastic grommets into place holes.
    Replacing 3rd brake light on 2005 Ford F-150
  11. Clean mounting surface with rag.
    Replacing 3rd brake light on 2005 Ford F-150Replacing 3rd brake light on 2005 Ford F-150
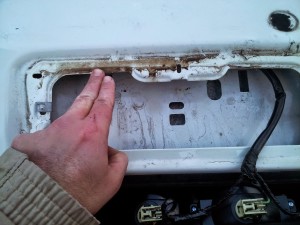
  12. Use DAP caulk to seal top half of mounting surface (optional).
    Replacing 3rd brake light on 2005 Ford F-150Replacing 3rd brake light on 2005 Ford F-150
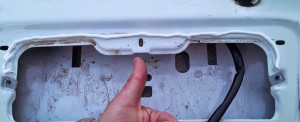
  13. Line up clips with screw holes.
    Replacing 3rd brake light on 2005 Ford F-150Replacing 3rd brake light on 2005 Ford F-150
  14. Mount new light lining up starting from bottom.
    Replacing 3rd brake light on 2005 Ford F-150
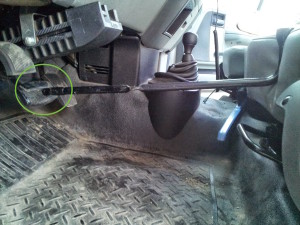
  15. Test light by turning on truck electric (position right be starting engine), placing 2×4 or other block between seat and brake pedal or asking assistant to press brake. I happened to have a the lug wrench handy.
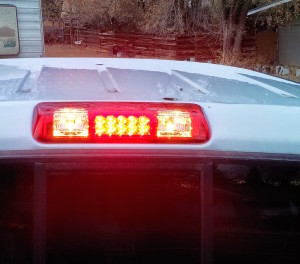
    Replacing 3rd brake light on 2005 Ford F-150
    Replacing 3rd brake light on 2005 Ford F-150
  16. Screw in light.
    Replacing 3rd brake light on 2005 Ford F-150
  17. Celebrate success!
    Replacing 3rd brake light on 2005 Ford F-150

Don’t be selfish . . .

Boxes to Bins :)

Don’t be selfish . . .

I have mentioned before that my house has VERY LITTLE storage. Because of this, you will be seeing me post with storage ideas more then once.

Boxes to Bins :)

My mother in law comes out to visit often and I am so blessed that she loves to be involved with my ideas and projects. I am also blessed because she sews the cutest little cloths for my daughter and she is an expert thrift shopper. The only problem with all this is that I have no where to put all the cloths.


Last time she was out visiting she came up with a solution to my problem. I buy wipes and night time diapers from costco and the box they come in is really strong. So, I save those boxes and put my daughters cloths in them that are too small or too big. However, I have been moving all the too small cloths into plastic storage bins to put in our crawl space and those boxes were becoming ugly temp cloths holders.


Boxes to Bins :)


Sandy, my mother in law, took the leftover drawer lining contact paper I had been using for wall paper in the camper and covered the boxes, making sure to keep the handholds exposed. Make sure to cut the tabs off before you put the paper on.

Boxes to Bins :) Boxes to Bins :)


They fit perfectly into the self in my daughter’s room that we got from IKEA. Now her PJ’s, sweaters and light coats have a pretty home and I have room in the drawers for more thrift store finds Boxes to Bins :)


 Don’t be selfish . . .

Playhouse Remodel

Don’t be selfish . . .

Playhouse Remodel

I have been wanting to find a little playhouse on Craigslist for Elora to play in while I garden, mow and weed. But after finally scoring one for $100, and setting it up in the backyard, I just couldn’t leave it as it was. The colors were all wrong and the inside was drab. Nothing a little spray paint couldn’t fix Playhouse Remodel

I used spray paint made for plastics – I changed brands up a lot. The copper over the bay window was just a metal finish spray paint and it has held up GREAT!

I used poster board and cardboard to block as I painted.

I built a wooden platform for the house to sit on, allowing for the little front porch.

Sorry that I didn’t take pictures as I went a long. But here are some from the final product.

Playhouse Remodel

Playhouse Remodel

The inside was the same color as the exterior walls. So, I started by spraying the walls yellow, the trim and ceiling cream and the wainscoting blue. The yellow was looking real bad even after three coats. To help disguise the problem I sprayed cream with a stencil and just didn’t worry about lining it all up.

Playhouse Remodel

The playhouse was missing the little chair that comes with it when purchased new for $400-$500. Getting it for $100 was worth not having the chair. I was really lucky when I found two classroom chairs for $2 each at the Thrift store. One was blue and the other yellow. (the same colors I used on the walls!) So I used the same little stencil and sprayed the chairs with the opposite color to make them cohesive and cute!

Playhouse Remodel

Playhouse Remodel

The little kitchen had lost all of the original stickers and was all one color. So I just brushed on a little interest with my paints.

Playhouse Remodel

My little one just loves her house!

Playhouse Remodel  Playhouse Remodel

Don’t be selfish . . .

Baby Swing!

Don’t be selfish . . .


I have seen these on pinterest and for sale on Etsy. I am awful at following tutorials but I at least read through this one first. http://onesassyhousewife.blogspot.com/2012/07/swingin.html (She has a lot more pictures of the process then I have and did a lot more work and spent more) Then I improvised and made my swing in under 2 hours. I would have been faster except I kept stopping to play with Elora. Baby Swing!

Baby Swing!

Okay, lets get started!

  • First you need to get a yard of canvas material, or other strong fabric of your choice.
  • Next, get large dowels from your local lumber store. Or, if your as CHEEP as me, then go to a ReStore or other used building materials type store and buy some stair railings for $0.50 that you can use on many projects to come.
  • Have a drill
  • Rope
  • Sewing Machine
  • And a tree or other strong secure place to hang it in.

Cut the material into 3 pieces.

  1. About 4 feet long and at about 1.5 feet wide.
  2. About 1.5 feet long and about 6 inches wide.
  3. about 1.5 feet long and about 1.5 feet wide.

I am sorry that I didn’t measure as I cut. I have a very photogenic way of doing things. I had a picture in my mind of how I wanted Elora to fit in it and how it would fit a future baby and I just eyeballed and cut.

Baby Swing!

Now you need to sew the seams and then sew the pieces together so they look like this. (I doubled them back in many places) The crotch section I created two different slots for the dowel to go in so that I could change it for a baby so the face wouldn’t be at the bar part. (you can see that this canvas had been a drop cloth for my art)

Baby Swing! Baby Swing!


Now drill holes into the dowels at each end by first marking the spot and making sure they will line up over eachother. Choose a drill bit that is large enough for the rope to fit through but small enough that your dowels keep their strength.

Baby Swing!  Baby Swing!  Baby Swing!

Now just slip the dowels through the canvas and the rope through the dowels. Tie the rope together meeting in a point at the top, if you want the swing to be able to spin without the rope twisting and untwisting. I then used a carabiner to clip it on so that I can take it down easy to adjust for baby or toddler.

Baby Swing!


Now you have a baby swing!

Baby Swing! Baby Swing! Baby Swing!

WARNING! child may love it so much that you find yourself pushing them for an hour at a time. Notice the wicker chair in the background? I sit there and read or work on this blog while she swings within reach and I keep it going.

Baby Swing! Baby Swing!


I was on a roll and decided to make two more swings for our “tree set” I made a trapeze and classic wooden. (the wooden one is about to be replace with a wider wooden one for stability reasons.)

Baby Swing!   Baby Swing!  Baby Swing!

Baby Swing!

Don’t be selfish . . .

Maxi Sheets :)

Don’t be selfish . . .

Maxi Sheets :)

Okay, so, I went through a stage of buying all these sheets at the thrift store with intentions of using them for fabric and making pillows, cloths and the like. Instead they were neatly and not so neatly stored in Tupperware down in the crawl space until this summer when I pulled all my fabric out and started way too many projects. By the last month of summer I had 5 projects going and none finished. Determined to get the place clean before we hosted a catered business event, I stayed up late sewing on the fly.

This maxi dress is one of the results of my no-pattern, fast sew projects.

First buy a sheet you like. I got a king sized one and I am glad I did for a number of reasons.

  1. I messed up when cutting the skirt out and underestimated my size :/
  2. I made another maxi dress using the same cloth (I’ll post that one later)
  3. I made a little mini-maxi for Elora that matches mine (scroll down to see)

Maxi Sheets :)


I cut the shape and size out using my store made dress. And then I cut again because I needed it larger. So, remember that a maxi dress looks lovely flowey and not so good tight so over estimate rather then under estimate Maxi Sheets :)

Maxi Sheets :)


I also bought a sweater like shirt from the thrift store that day to use as the top of my dress. (I will no longer sew with this type material…way to hard for a beginner like me) I cut the sleeves off the top allowing the seams to stay with the shirt as much as possible so that I wouldn’t have to create new seams.

Maxi Sheets :)Maxi Sheets :)

Now sew skirt together and remember to take your time on the hem (you can also add lace or ruffles on the bottom).

Maxi Sheets :)

Sew the waist band on the skirt so you can pull elastic through at the waist. Sew the top on at the waist (Try it on before this last step and mark on the shirt with chalk how high you want the skirt to go on your midsection). Sew all together and your done!

Maxi Sheets :) Maxi Sheets :)

I used the lefts overs to sew a mini maxi for Elora. I used muslin and elastic for her top and the straps are just the muslin sewn and cut to tie together on the shoulders.

Maxi Sheets :)

Maxi Sheets :)   Maxi Sheets :)   Maxi Sheets :)

Maxi Sheets :)   Maxi Sheets :)   Maxi Sheets :)  Maxi Sheets :) Maxi Sheets :)


Don’t be selfish . . .

The Night Sky

Don’t be selfish . . .


The nursery is sort of cute. Mostly it is designed for sleep and with the idea that it should be gender neutral so that we don’t have to re-decorate for every child. The thing that took the most time was the ceiling.

To start, I painted it a very deep blue/grey. We researched and purchased a toy planetarium to project the constellations onto the ceiling and mark them with a pencil.

The Night Sky


Then I bought emergency glow int he dark tape and cut circles of different sizes out.

The Night Sky


The Night Sky

Then we just stuck them up.

The Night Sky


The result is truly lovely. When rocking my little one to sleep I feel like we are out under the stars. It helps to remind me to thank God and give Him the glory every night.

Don’t be selfish . . .

Stuffed Animals to Stuffing.

Don’t be selfish . . .

Stuffed Animals to Stuffing.
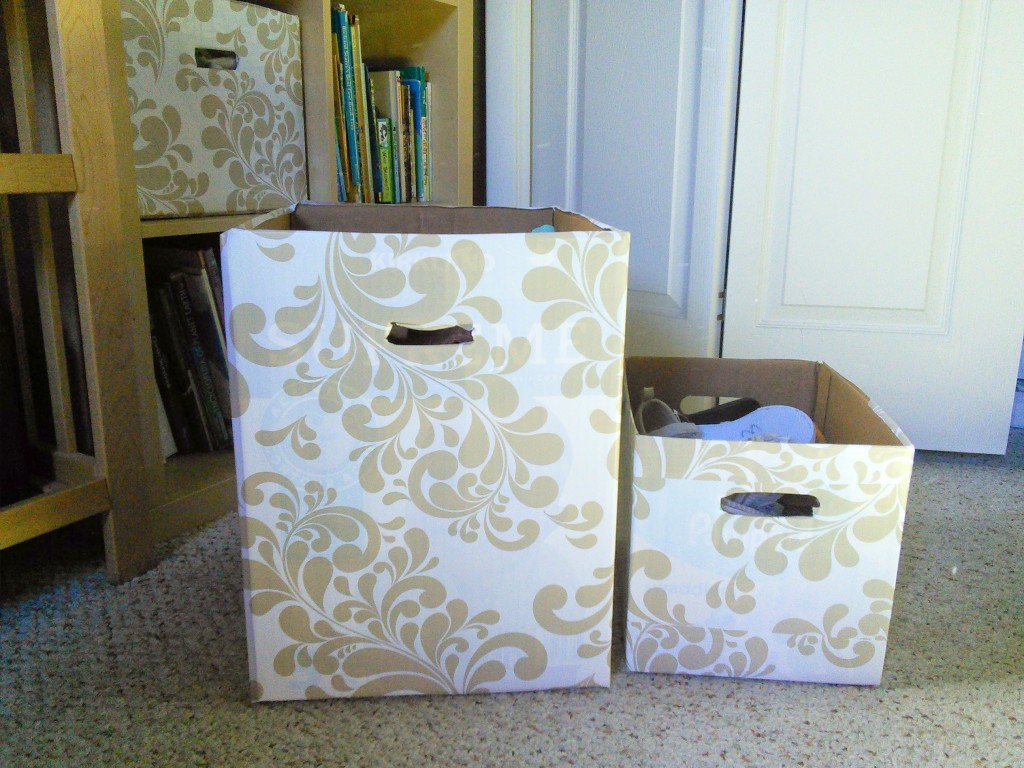
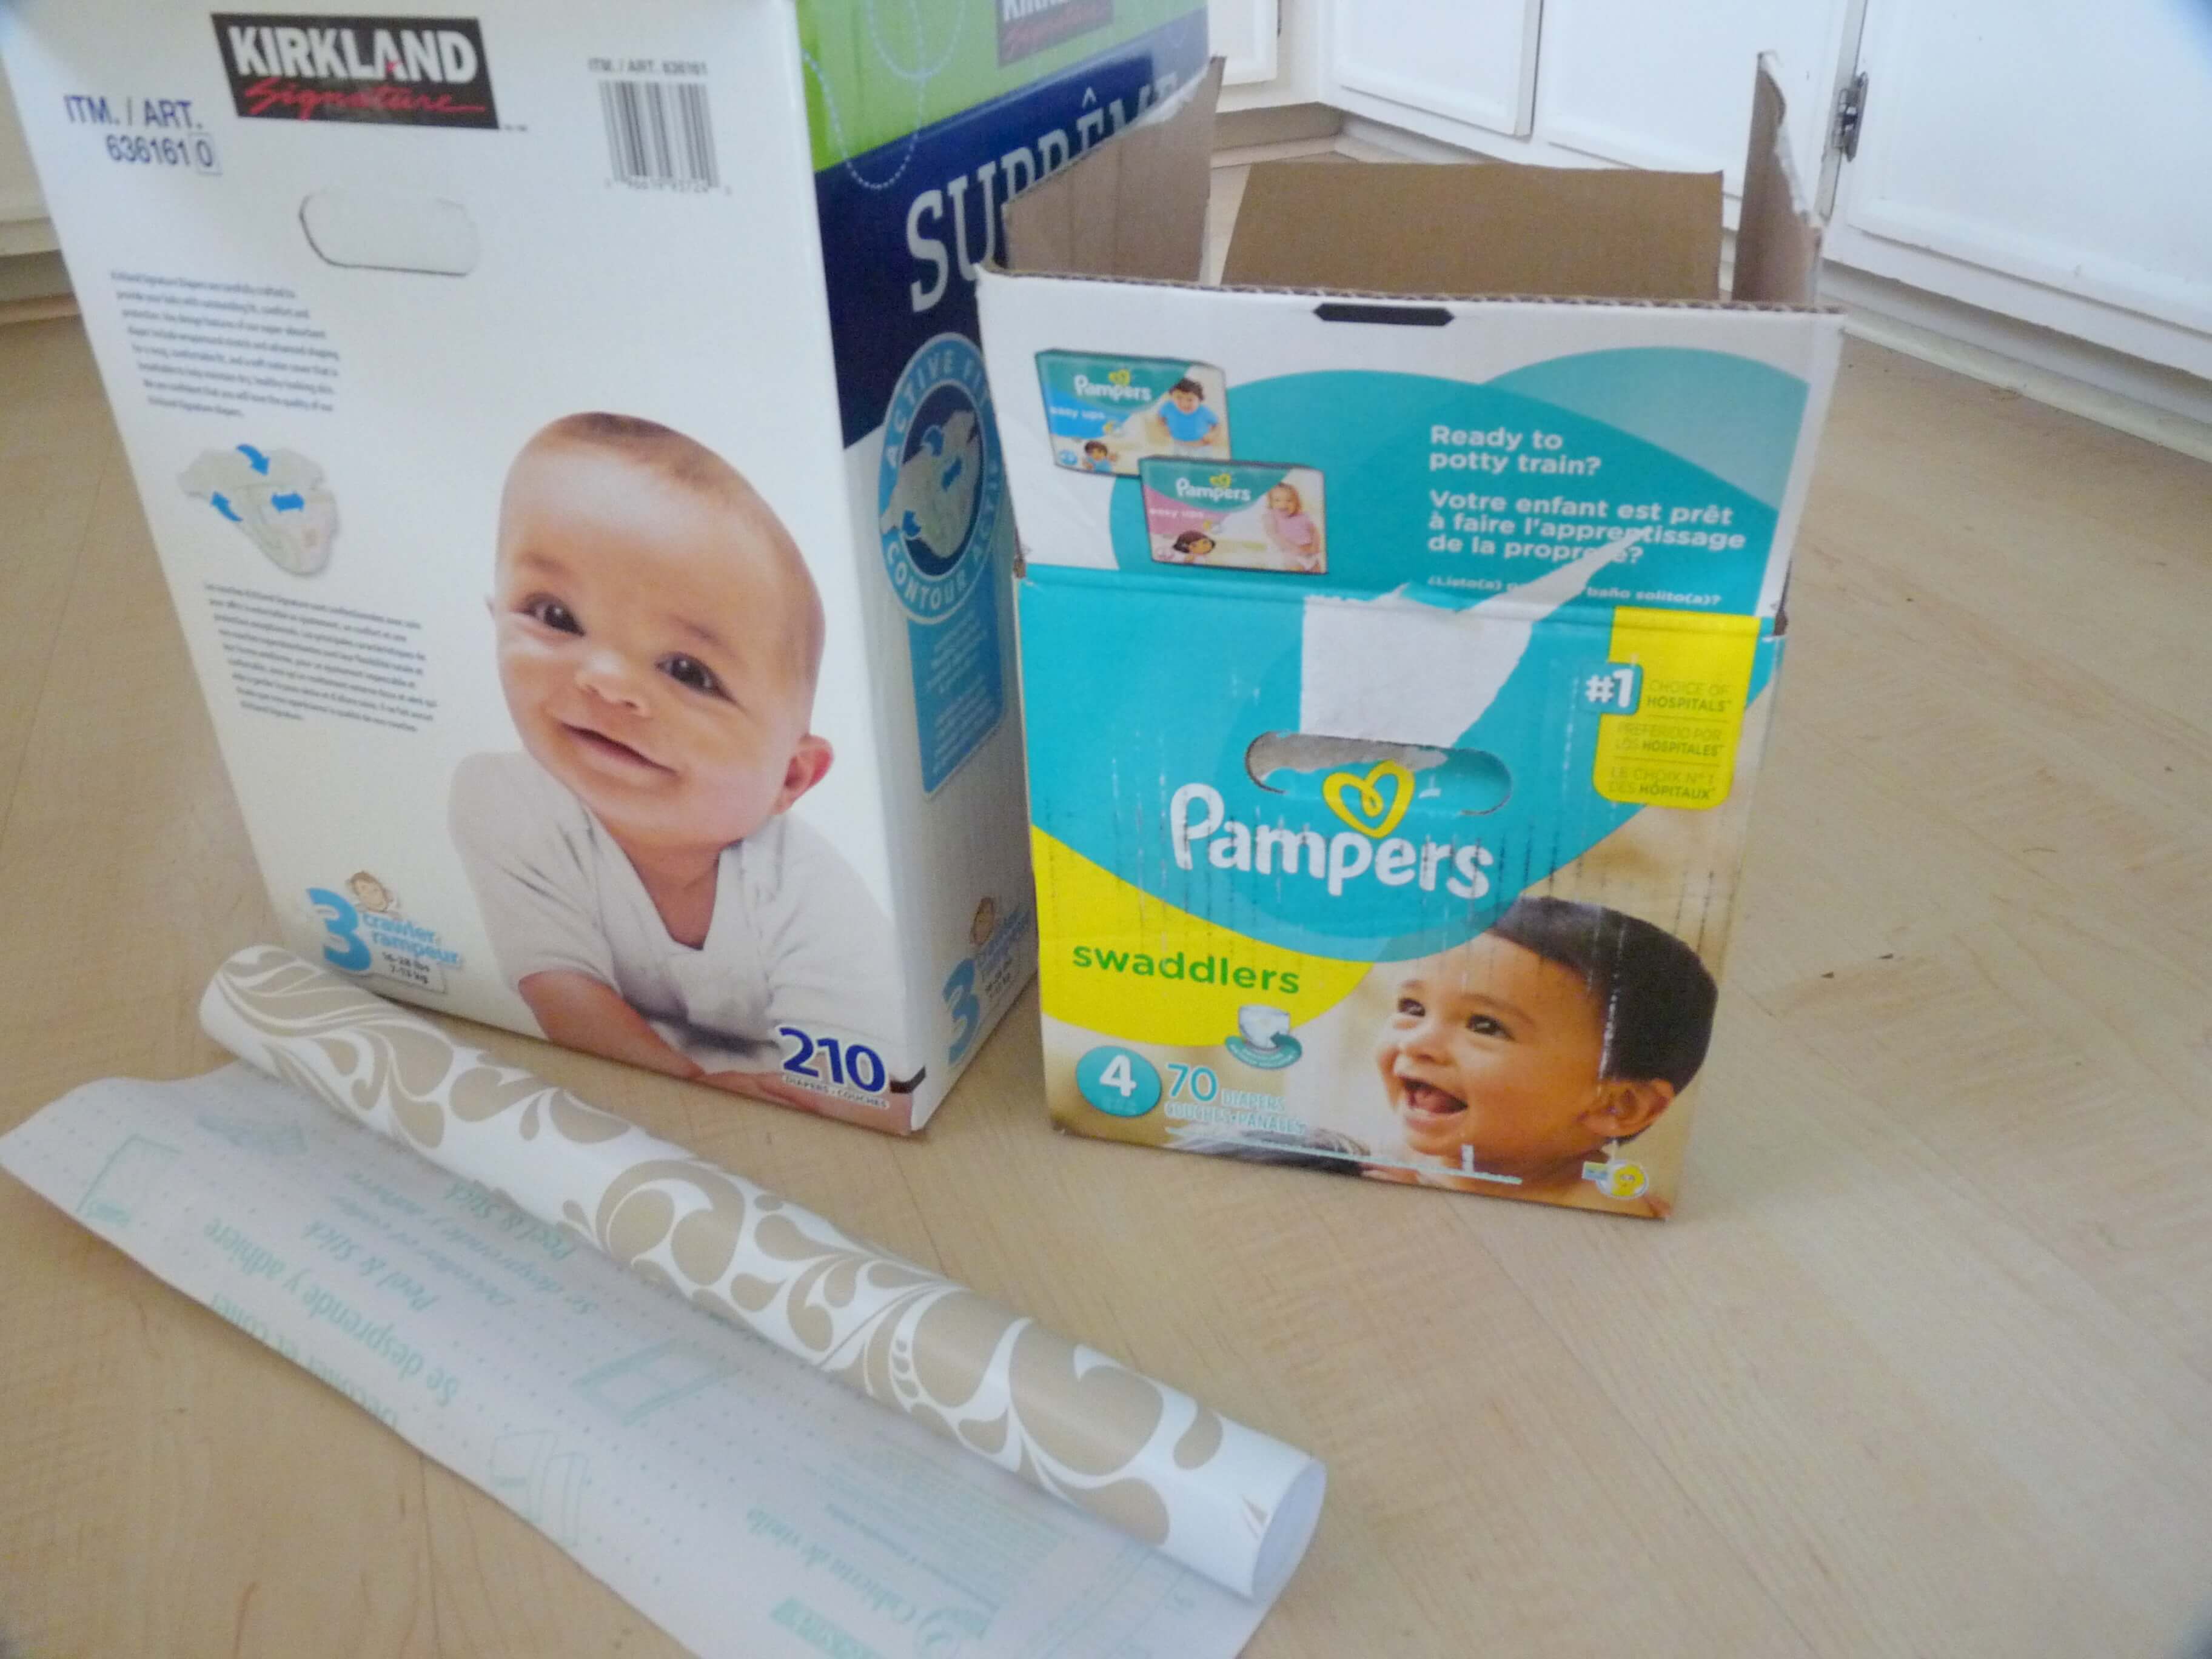
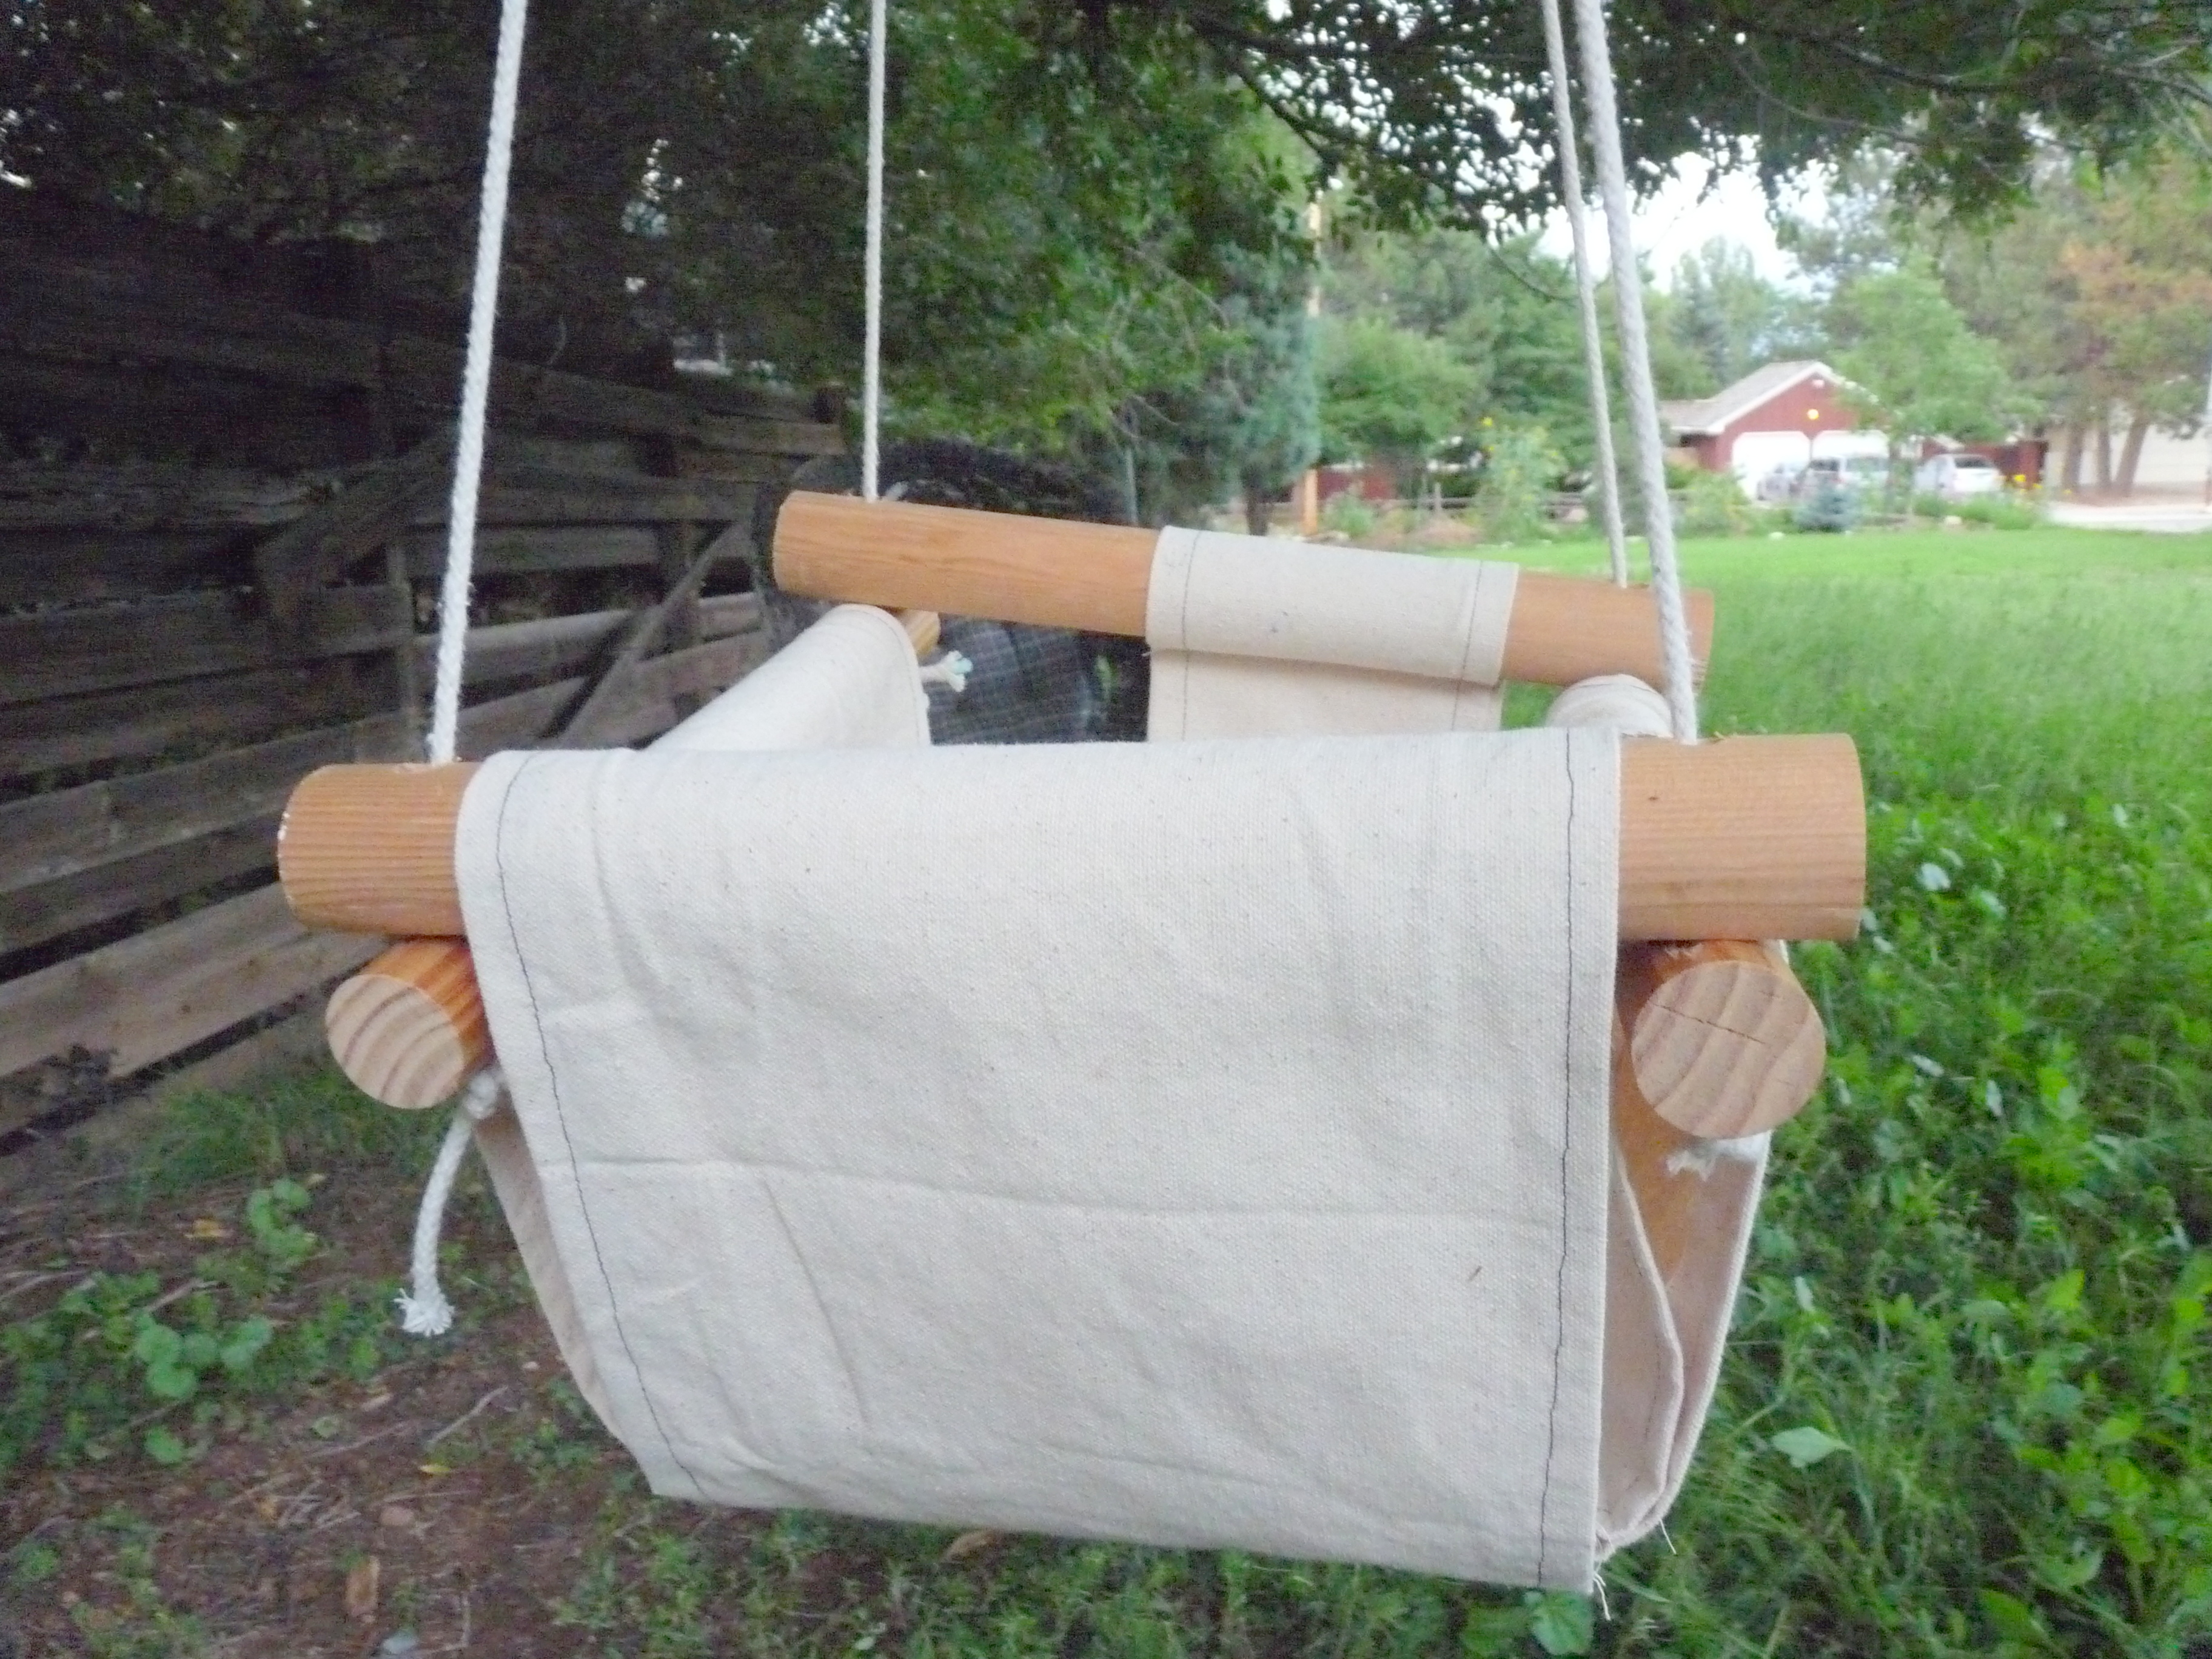
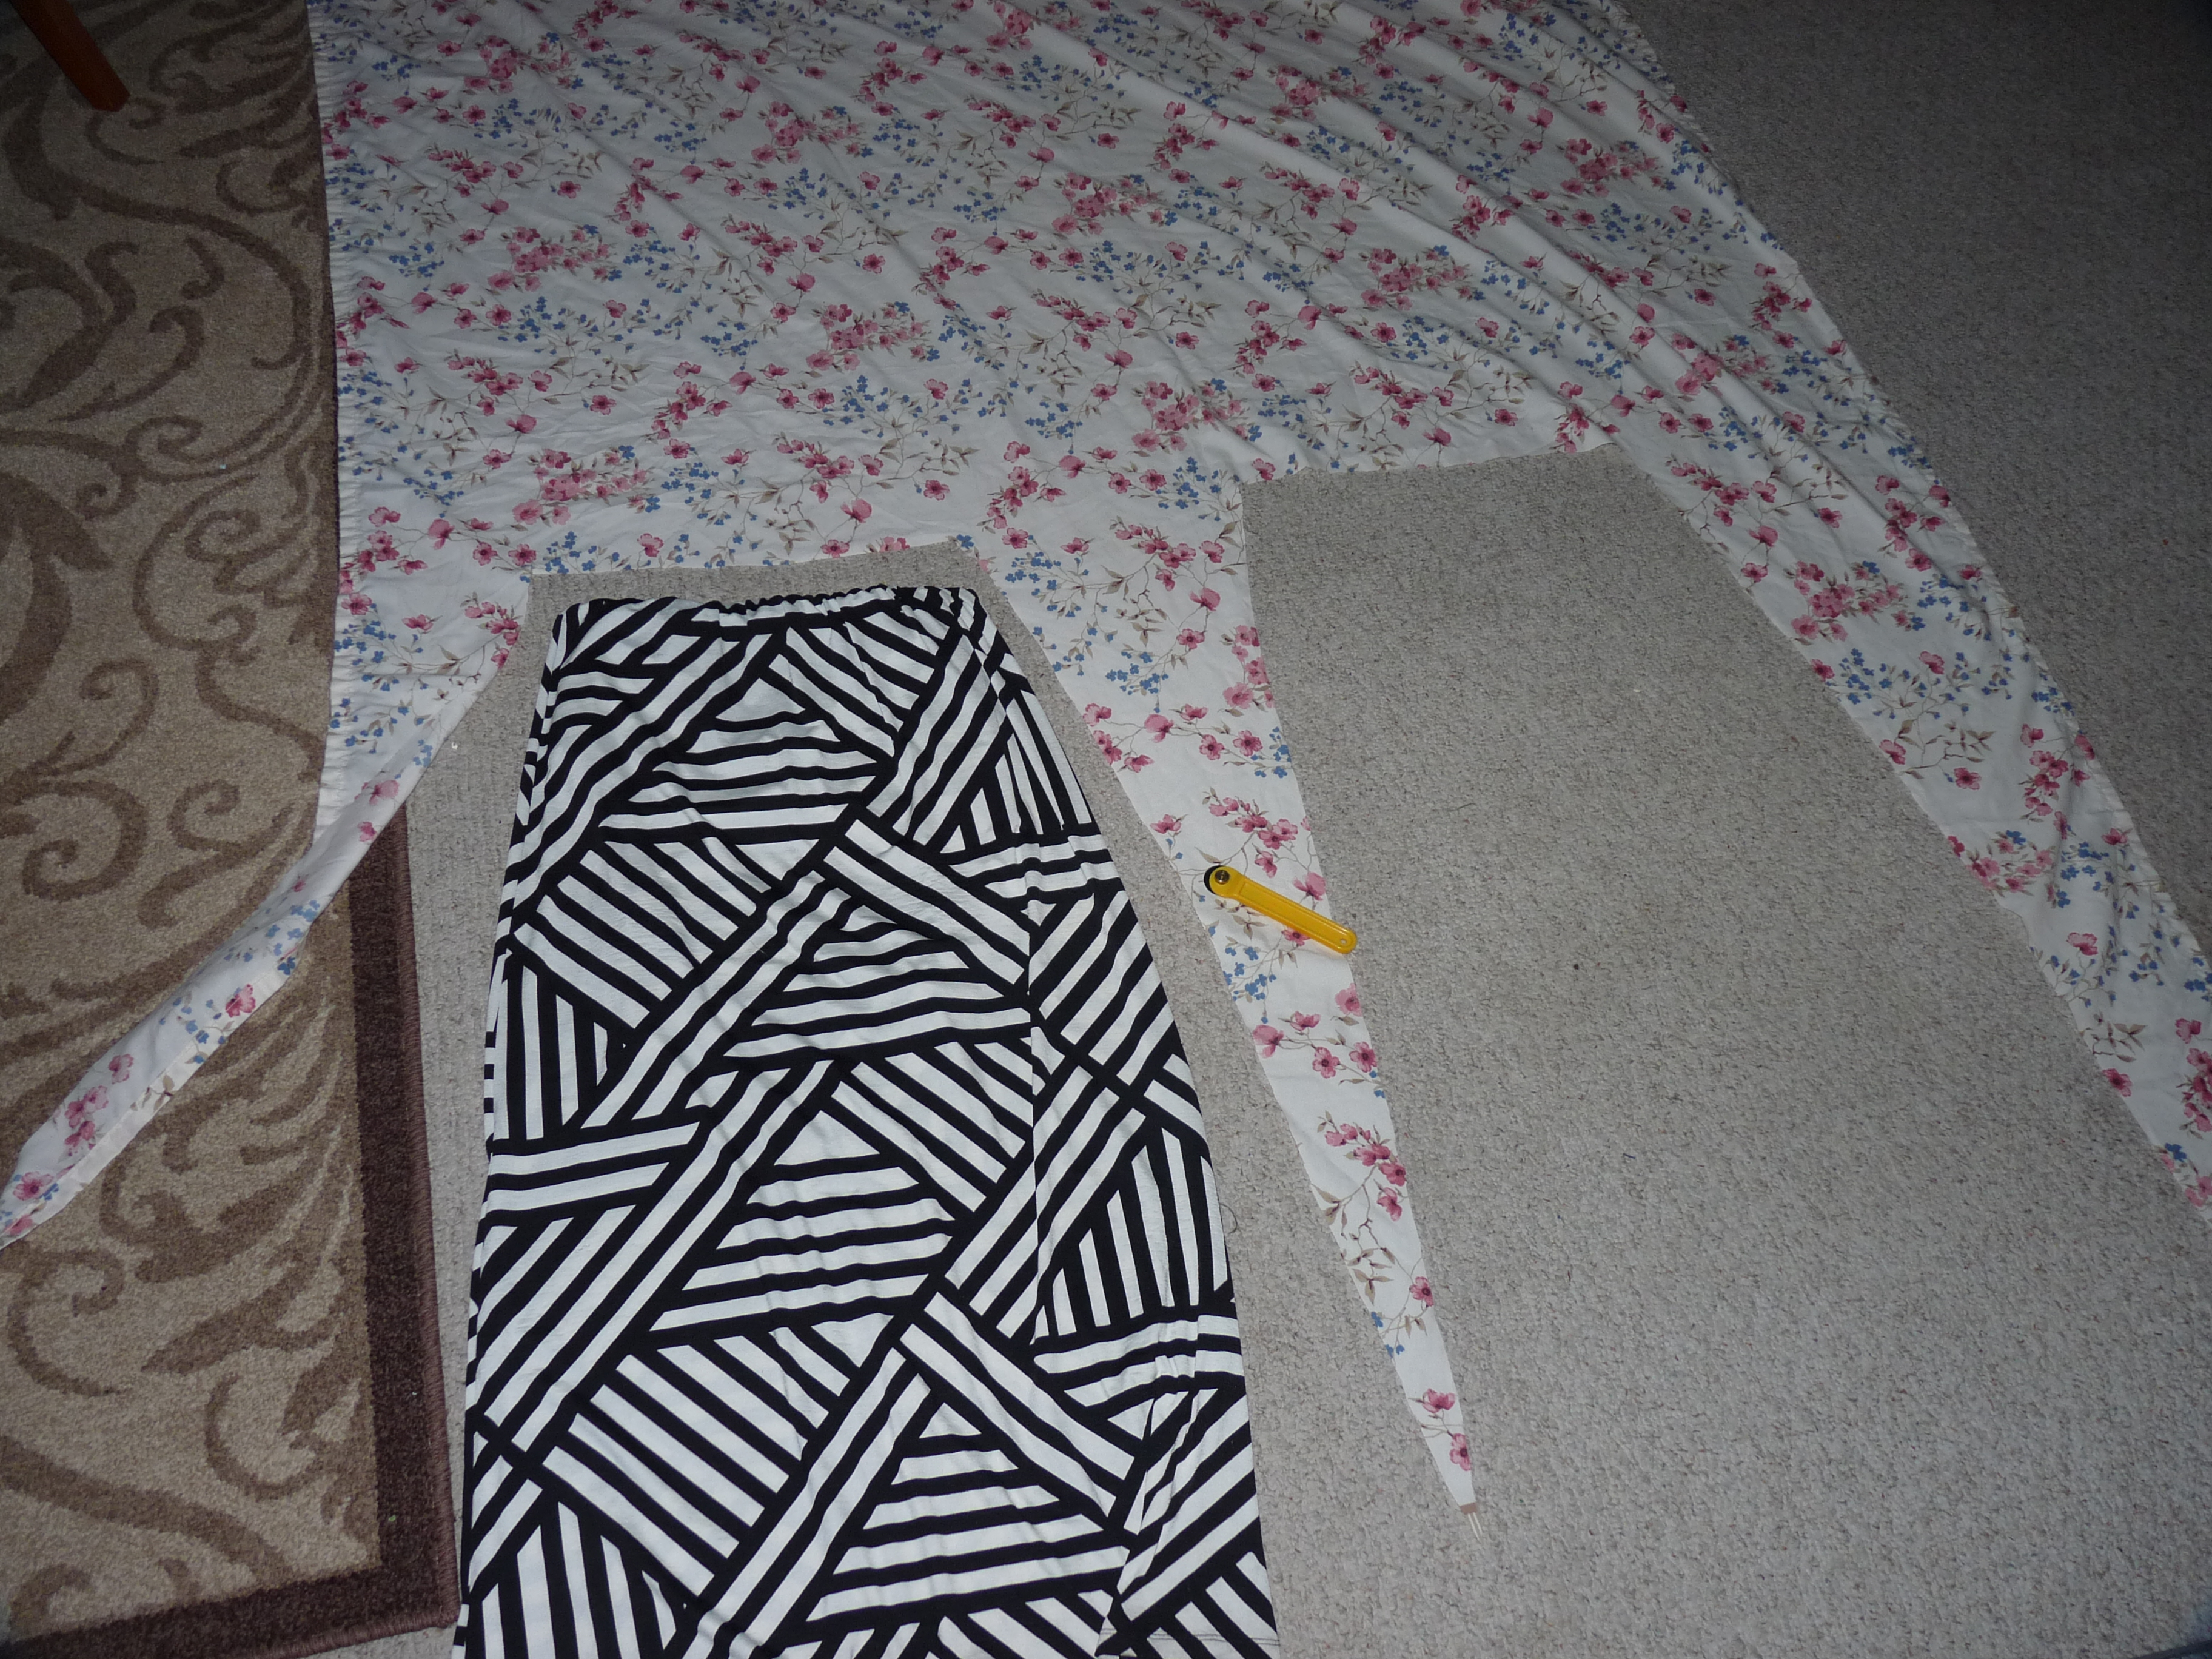
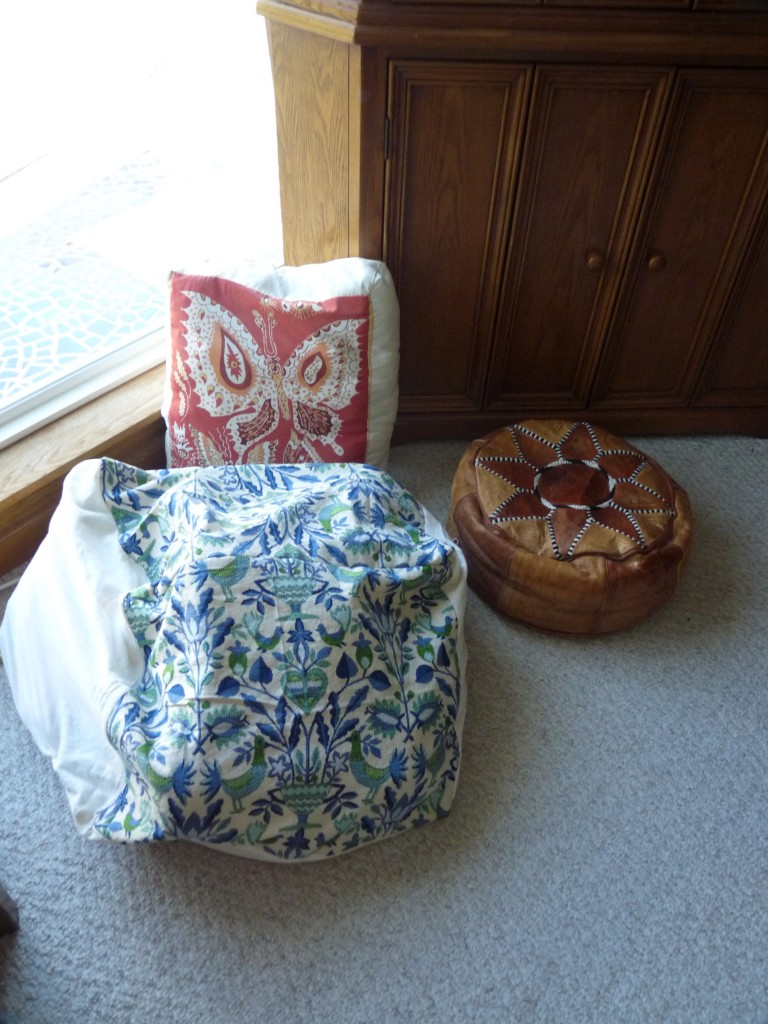
I have seen where other bloggers have purchased bean bag covers from Bed Bath and Beyond or The Pottery Barn for a reasonable price and used them to store their kids stuffed animals. But I am CHEEP!

My daughter is a social little critter. This results in all her toys being drug out into the great room. I have been trying different methods of attractively storing her toys but few have worked out, or been durable enough to last.

I have A LOT of scrap fabric. She has a lot of stuffed animals. They went together nicely… and so far the solution has worked.

Stuffed Animals to Stuffing.

Buy a long zipper. Mine is 24 inches. Gather your scrape material and lay it out in a way that you can get an idea for how big your bag will be. My scrapes were not enough to make the size bag I wanted so I added in simple muslin.

Stuffed Animals to Stuffing.

Sew the shape you want. I wanted a cube because sphere bean bags are too common.  Sew the zipper in along one of the seams.

Stuffed Animals to Stuffing.

Next stuff all those cute little critters in it.

*WARNING* Remove child before closing Stuffed Animals to Stuffing.

Don’t be selfish . . .

Baby Swing

Don’t be selfish . . .

So, we have this large tree that we call “the dirty tree” whith reaches into our side yard from our neighbors house. It is dirty because of how bad it sheds in the fall into our pool and everytime that the wind picks up, even a little, it drops sticks all over the yard and the little mini “dirty trees” grow like weeds in every garden, nook and cranny and fence line around the house.

Since it is not our tree and we enjoy the shade it offers, I can’t cut it down. To make use of the thing, I decided, one impulsive afternoon, to turn it into a swing set.

I made a baby swing and a few other fun swings and attached them to the limb.

For the baby swing I just did a lot of eyeballing but I originally got the idea from pinterest and this tutorial – http://www.themakerista.com/2013/07/baby-swing-tutorial-giveaway.html

Baby Swing


Here is what I did!

First I cut up some of my painting canvas that I use to cover the floor for protection. I think you could use just about any fabric just be doubling it up. But I like the look of canvas and it’s durability.

I just eyeballed what I thought would work. You will need to cut three pieces. Remember to leave room for seams. Then sew them together to form the bottom and sides out of the longest piece, the back out of the wide one and the narrow one is the crotch part.

Baby Swing  Baby Swing


I love our local Habitat for humanity Restore. If there is one where you are located I highly recommend making yourself acquainted with it.

I found what had been stair railings and I have used them for curtain rods, ladders, tents and this project… so far.

You can also use large dowels found at your local hardware, building supply store.

You will need 4 with holes drilled into each end.

Again, I eyeballed to cut mine. About a foot and a half. A helpful, time saving tip here is to make sure that the bit you use will produce holes large enough for the rope to fit through Baby Swing

Baby Swing  Baby Swing  Baby Swing


Now all the hard stuff is done.

Just insert through the seat and line the holes up over each other and run a sturdy rope through to hold them together with gravity and for attaching to the tree.

Tie knots into the bottom of each rope. for extra stretch I ties the knots around a large metal nut.

Baby Swing


Baby Swing

Any there you have it!

Baby Swing

I also made a classic swing and a monkey pole swing. Just because . . . Why Not.

Baby Swing  Baby Swing

Baby SwingDon’t be selfish . . .

Being.

Don’t be selfish . . .

My little girl is just about to turn 2.5 years old. Being. and Being.

I have never felt so complete in my roll as a child of God. Being a mother is the biggest and hardest and most rewarding thing I have ever done. I use to think that I had to be in the mission field or doing some new and novel thing for humanity for me to feel like I am making my life worth surviving cancer when so many die from it daily. (more on that on some other day in some other post) Being responsible for the mental and physical health and well being of this tiny, helpless person, has finally put my pressure to make something of myself to rest. I am honored to take this job on. That God trusts us with such a large task is beyond me.

Being a parent has also put a lot of my concerns and confusion about the human relationship with God to peace too. I still am on the spiritual journey. I hope to never think that I have it all figured out, because then I think that I would be spiritually complacent. But loving someone who can’t understand the love I have for them and who will do things I ask her not to do and who will hurt me and rebel from my love. This role I am in has given me a better idea of why God did what he did and does what he does for each one of us.

Being.Don’t be selfish . . .